Showing posts with label Tutorials and Craft Ideas. Show all posts

Wednesday, December 22, 2010

EB Special Guest Post: Show Your Style with Handmade Clothes

The Elle's Beads Blog has opened up guest posting opportunities to knowledgeable craftspeople who are enthusiastic about handmade.  I hope you enjoy this new endeavor!

With so many shops and sites selling mass-produced clothes on the cheap, how’s a girl to show her sense of style - without spending a fortune? Of course there are loads of ways of styling up an outfit to inject some personality, but for a guaranteed unique look, handmade clothes are the way to go.

Coat's & Clark's Thread
Photo by trekkyandy
Used under Creative Commons License
When I say handmade, I don’t mean that you have to hunch over a needle and thread to get that “authentic” look. Shop-bought patterns, whizzed up on a sewing machine can still have loads of personality as well as being a perfect fit. The trick is to look for patterns marked as simple or easy, and if you’re not sure how to do that go ahead and ask the shop assistant for help!

Now you want to pick fabric that’ll make your simple pattern shine. Seek out vintage fabrics, patterns and colours that you love, to make even the simplest smock stand out. Or get playful with your choice of dress fabrics - try velvet instead of cotton, embroidered fabrics and brocades.

If you’re panicking at the mere thought of crafting your own clothing, there’s still lots you can do to get the homemade effect. Even simple customisations, like stitching a trim to a skirt or cutting a new neckline into a plain t-shirt, can transform your clothes instantly.

And there are a whole host of fixings and fastenings that can be used on your clothes to minimise stitching. From safety pins for a punk look to fabric glue and the less messy fusible fabrics – sometimes called “no sew” adhesives. Just place the adhesive between the two pieces of fabric, iron and voila! You’ve just customised your clothes.

 summer grass dress
Summer grass dress
Photo by ingermaaike2
Used under Creative Commons License
If you’re brave enough to give a homemade dress a go, but are still scared by proper patterns, get online. There are loads of great craft blogs with simple tutorials for dresses, shirts and skirts for maximum impact with minimum effort.

Or if you prefer books, there are lots to choose from. I’m a fan of Yeah, I Made It Myself by Eithne Farry. The subtitle - DIY Fashion for the Not Very Domestic Goddess - tells you all you need to know about this book.

Once you’ve got the hang of dressmaking, you’ll find her simple ideas a little pedestrian. But if you’ve got enthusiasm and not a whole lot of technical skill, it’s a great starting point – even Coco Chanel had to learn somewhere.

So if you’ve got a fabulous fashionista inside you just waiting to break out, start to make your own clothes. Not every experiment will work, but you’ve got to keep going until you’ve built up the skills to personalise your entire wardrobe (although you don’t have to customise/hand make everything).
Good luck!

About The Author

Katie Saxon is a devoted crafter who loves to make clothes. She’s working for White Lodge Fabric, a UK-based online fabric shop selling dress fabrics worldwide.

Monday, April 5, 2010

Two Fun Beaded Ring Tutorials with Fish Beads from SB Supply

I recently received some really fabulous beads with which to experiment and come up with a tutorial for a beaded ring.  You can purchase the striped fish beads I'm using for yourself from SB Supply at sbsupply.etsy.com.

I ended up making two tutorials since the shop owner was generous enough to ship me six beads.  The first one is for a floating ring.

Here's what you'll need:

1. A fish bead from SB Supply
2. Small blue glass beads (around 2 mm)
3. Looped ring
4. Thin beading wire (around 34 gauge)
5. Jewelry pliers
6. Wire cutters

Okay, now for the tutorial.  The first step is to attach the wire to the ring.  Tie a knot around one of the loops and then repeatedly loop the wire around that metal loop and the one next to it.  


Slide the fish bead onto the wire.  Then take the open end of the wire and attach it to the metal loops on the opposite side of the ring.  You'll probably need the pliers to pull the wire through tightly.


As you secure the wire, try to center the bead over the loops.


Take another piece of wire, about 8 inches long, and string your blue glass beads on it.  Make sure one of the ends is knotted (use the pliers) so that the beads don't slide off the end.


Take the string of beads and wrap it around the outside of the loops on the ring.  Use the extra wire on the end and keep wrapping around tightly to secure the strand.


You'll end up with a ring that looks like a fish floating through water.  Cute right?


That ring is a little bit difficult to make without snapping the wire, so experiment with a thicker gauge if you need to.  Alternatively, try this wire-free tutorial below.  This one uses both beads and buttons.

Here's what you'll need:

1. A fish bead from SB Supply
2. A "two hole" button (button that's flat on the back)
3. A flat round ring (I'm using one with a 12 mm pad)
4. E6000 or your favorite adhesive

Now for the instructions.  First, attach the button to the ring with adhesive.  Allow it to dry completely.  I'd leave it for 24 hours.


Then put a SMALL amount of adhesive on the top of the button.  I emphasize small because you're going to take the fish bead and press it into the adhesive, attaching it to the top of the button.  If you put too much adhesive on, it's going to squish out the sides of the bead making your ring a little less polished in appearance.


Once you've attached the bead let it dry - again, I recommend waiting 24 hours to make sure it's completely dry.  Then you've got a really cool beaded button ring!


Mix and match colors, add another button layer before putting on the bead, add extra beads around the edges, do some decorative wire wrapping from the inside of the bead down the sides of the ring - just get creative!  This is a really versatile project that you can adjust to flow with your own creative juices.


I hope you enjoyed the tutorial!  If you'd like to purchase a fish beaded ring instead of making your own, be sure to visit my shop at ellesbeads.etsy.com.  I'm keeping the yellow ring for myself, but I'm putting the other rings up for sale soon!

Until next time,
Elle

Friday, January 15, 2010

EB Friday Hotlist: Totally Tutorials

This week I'm featuring a fellow blogger, Dotty at Totally Tutorials.  This blog is exactly like it sounds - jam packed full of interesting tutorials for artisans and fans of creativity to try for themselves.  No matter what kind of crafts you make, Dotty's sure to have a tutorial you haven't seen yet!


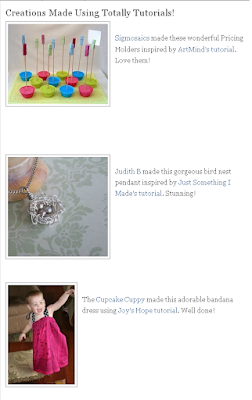
Totally Tutorials is a great site for two reasons.  The first is obvious - you can learn a lot of great new ideas from there!  Originality is never completely original.  We're all inspired by something or someone which we interpret in our own way when we make our crafts.  Just flipping through the pages here can spark an idea that you may be able to incorporate in your current work or tempt you do something new.  All of the tutorials are submitted with the understanding that artisans may use them to create their own works for sale.  Putting your own spin on something posted there may be just what you need to jump-start or reinvigorate your stock!


The second reason Totally Tutorials should be your go-to site for crafty ideas?  You can get free exposure just for participating in a Tutorial Exchange!  Dotty doesn't create all of these on her own - supply sellers and handmade artisans are brought together to make these tutorials happen.  The supply seller...well...provides the supplies.  I guess that was obvious! :) The artisan then uses them to create a unique tutorial which is uploaded to and featured on the Totally Tutorials popular blog site, viewed by hundreds of people per day.  Dotty details the benefits of this exchange and how it will get you exposure as either an artisan or a supplier:


Whether you make your crafts for profit, you're looking for a new hobby, or you want to get more exposure as a supplier to the handmade community, Totally Tutorials can be a site that will meet your needs.  Be sure to check it out and let me know if you try anything from the site!

Know of any other great tutorial directories or exchanges?  Post them in the comments!  Feel free to link to your own tutorials as well!

Until next time,
Elle

Wednesday, January 6, 2010

Jewel It Out! - Mini Jeweled Boxes Tutorial

I hadn't posted a video  in a while so I wanted to make sure I did this week.  YouTube hasn't finished processing my tutorial vid as of the time of this post but hopefully it will be up and running soon.  This tutorial is fun, easy, and best of all cheap!  Who says you can't make great gifts on a budget?  Make a bunch of these for about $.60 to $1 a pop and give them out for Valentine's Day or resell them in your shop!  Experiment with rhinestones, different types of beads, or anything else you can think of!  Happy Crafting!


Thursday, December 24, 2009

Mini Magnet Christmas Gifts

As some of you may be experiencing, my economic situation has forced me to give more hugs and fewer gifts this holiday season.  Even so, to show my support for artisan goods as an alternative to mass produced goods, I decided to only give handmade gifts this year.  My mother and my grandmother have been there for me above and beyond this year financially as well as emotionally.  I decided that since my resources are limited right now, I would only give presents to the two of them as a small token of my thanks.  If you've read my previous post, you know that I bought my grandmother some pink sterling earrings in the shape of cancer ribbons.  I'll try to remember to snag a photo of these after she opens them so I can show what they look like.  I don't want to undo my wrapping:


(Handmade gift tag purchased from Connie at thetinyfig.etsy.com)


For my mom, I debated over whether I wanted to make Christmas ornaments or magnets.  I didn't have access to the pictures I wanted for the ornaments, so I made her some festive magnets instead:


(Handmade gift tag purchased from Connie at thetinyfig.etsy.com)


Think she'll like them?  I named the penguins Penny and Peter.  She's a speech-language pathologist working with children in the school system, requiring her to constantly use her imagination and make up kid-friendly stories, so I think that'll amuse her.

Did you make anything fun for a friend or loved one this Christmas?  Let me know in the comments!

Until next time,
Elle

Sunday, December 6, 2009

Update on Fabric Flowers and Shopping and My First Craft Show!

So after my sad, droopy flower (which I've made into a refrigerator magnet) I decided to make another one Thursday night.  I think it's much better:


I turned this one into a pin and wore it to work on Friday:


I've found that it's much easier to use a button with a raised back than it is to cover and use a button with holes.  The flowers still take me about 2 hours to make and by the time I'm done I don't want to ever see fabric again...but they really are fun and easy.  I made another one which I've turned into a barrette:


These flowers really are creative!  Please visit Sew Ritzy~Titzy's blog for the tutorial.
_______________________

So I've been shopping at A.C. Moore, Michaels, Panopolie, and Carolyn's Bead Addiction so much, I'm not sure I have enough gas to go anywhere else this week (oops!).  Check out some of the awesome things I picked up!


Now I'm going to get the chance to incorporate filigrees (is that a valid word?) and vintage buttons into my work for the first time.  These pictures don't provide an all-inclusive list of everything I purchased, but you get the idea.

So why, besides the fact that I love my craft, did I feel the need to go crazy in almost every craft store and boutique I could find?  I received an email from the Raleigh Jewelry Meetup Group that a craft show was going on Dec. 12-13 and there were still plenty of spaces for artisans to sign up.  I jumped on the opportunity and now I'm going to be selling at my first official craft show next weekend!  I have been trying to get advice on what to do and so far what I've noticed is that artisans mention over and over the importance of having a variety of different styles of items and large quantities of stock.  Since my first shopping excursion, I've dedicated myself to do as much crafting each day as possible.  I probably spent 12 hours yesterday making new items.  Want to see some of the newer items I plan to bring to the craft fair that aren't on Artfire or Etsy yet?  Check out the photos below or visit my Flickr Photostream.


Created with Admarket's flickrSLiDR.
 
If you're in the Raleigh/Durham or Central NC areas, make sure you attend the craft show, Carolyn and Friends Artist Affair.  It's located at Carolyn's Bead Addiction (formerly Bead Delite) on Old Wake Forest Road near Capital Blvd and Triangle Town Center Mall.  Be sure to visit my Google Calendar in the side bar and click on the event for more information and the complete address.  I will be there both Saturday and Sunday Dec. 12-13.  I hope to see some of you there!  If you're an artisan, contact Carolyn ASAP via email at carolynsbeadaddiction@yahoo.com as she has a ton of space outside of her boutique and may have some left for you to sell as well.  If you come either as a customer or as a fellow seller, make sure you introduce yourself both in the comments and at the show!

Until next time,
Elle

Wednesday, December 2, 2009

Cute Fabric Flowers and How You Can Make Your Own

The sewing I did this afternoon did not quite go as planned, but I think I'll get better once I've done more of them.  I found this fantastic tutorial for making fabric flowers here: http://sewritzytitzy.blogspot.com/2008/11/from-annas-gardenfabric-flower-tutorial.html and decided to give it a whirl.  Don't laugh at my flower:


My tiny worktable, so I can watch TV while I sew


My grandmother's antique sewing machine she gave me to work on


My crafty tiara...don't ask because I don't know.
And ignore the clean laundry to my left.


Work in progress


Finished product


My scary looking sewing on the back of the flower

If you sew at all, make sure you check out the tutorial.  Even though it took me 2 1/2 hours to make this droopy flower, it was tons of fun and I can't wait to try another one tomorrow.  If you try this tutorial at any time, please let me know in the comments and take a picture of the flower if you can!

Tuesday, October 20, 2009

The smell of sweet potato pie is in the air...

It's almost Halloween and there's a delightful crisp in the air.  This is the perfect time of year to experiment with deep earth tones, bright reds, oranges, and yellows.  Spruce up your fall wardrobe with my Halloween and Autumn-inspired earrings:


Falling Leaves

 
 Frightfully Orange


Feeling crafty yourself?  Experiment with these fun craft projects from others online:
Until next time,

Elle